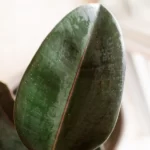
If you are a plant enthusiast looking to expand your indoor jungle, propagating a rubber tree (Ficus elastica) can be a rewarding and cost-effective way to do so. Rubber trees are popular houseplants known for their attractive foliage and air-purifying qualities. In this guide, we will take you through the step-by-step process of propagating a rubber tree successfully. Whether you’re a seasoned gardener or a beginner, this article will provide you with all the necessary information to propagate and nurture a new rubber tree from cuttings.
1. Understanding Propagation
Before we dive into the process, let’s understand what propagation means and why it’s an essential technique for expanding your rubber tree collection. Propagation refers to the process of creating new plants from existing ones, and it allows you to multiply your rubber tree without purchasing additional plants.
2. Gathering Materials for Propagating a Rubber Tree

To start with propagation, gather the necessary materials, which include:
- Sharp Pruning Shears: You’ll need these to take clean and precise cuttings from the mother plant.
- Rooting Hormone: This will help stimulate root growth in the cuttings.
- Pots with Drainage Holes: Opt for small pots filled with a well-draining potting mix.
- Clear Plastic Bags: These will create a humid environment to encourage root development.
- Misting Spray Bottle: Use this to keep the cuttings and the soil moist during the rooting process.
You can also check our other rubber tree guide
Unveiling the Tineke Rubber Tree’s Beauty and Care
Burgundy Rubber Tree: the new favorite houseplant, surpassing the Monstera craze.
3. Selecting Healthy Cuttings

Look for healthy branches on the rubber tree with at least two to three sets of leaves. The cuttings should be around 6 to 8 inches long and free from any diseases or pests.
4. Pruning and Preparing Cuttings
Using sharp pruning shears, make clean cuts just below a node, which is the point where the leaves are attached to the stem. Remove any excess leaves to reduce moisture loss during rooting.
5. Applying Rooting Hormone
Dip the bottom end of the cuttings into rooting hormone powder. Gently tap off the excess powder to ensure an even application.
6. Planting the Cuttings

Fill the small pots with a well-draining potting mix and create a hole in the center. Insert the treated end of the cutting into the hole and gently press the soil around it for stability.
7. Creating a Humid Environment
To increase the chances of successful rooting, cover each potted cutting with a clear plastic bag. This will retain moisture and create a humid microclimate for the cutting.
8. Providing Adequate Light and Temperature
Place the pots in a bright, indirect light location. Rubber trees prefer warm temperatures, so ensure the room temperature remains between 70-75°F (21-24°C) during the rooting process.
9. Watering and Care

Check the soil moisture regularly and mist the cuttings when the soil feels dry. Avoid overwatering, as excessive moisture can lead to rot. The rooting process can take several weeks, so be patient and monitor progress.
10. Transplanting the Rooted Cuttings
Once the cuttings have developed a healthy root system (you can check this by gently tugging on the cutting; if you feel resistance, it has rooted), they are ready for transplantation. Repot the new rubber plants into larger containers with well-draining soil.
11. Providing Proper Care for Young Plants
Place the newly transplanted rubber trees in a well-lit area, but avoid direct sunlight. Water the young plants when the top inch of soil becomes dry, and fertilize them with a balanced liquid fertilizer every four to six weeks during the growing season.
12. Pruning and Maintenance
Regularly prune your rubber tree to maintain its shape and promote bushier growth. Remove any dead or yellowing leaves, and dust the leaves occasionally to keep them clean and healthy.
13. Troubleshooting Common Issues
- Yellow Leaves: Overwatering or poor drainage could cause yellow leaves. Adjust your watering routine and ensure the pots have drainage holes.
- Drooping Leaves: This can indicate underwatering. Check the soil moisture and water accordingly.
- Pests and Diseases: Keep an eye out for common houseplant pests like spider mites or mealybugs. Treat affected plants promptly with insecticidal soap or neem oil.
14. Conclusion
Propagating a rubber tree can be a gratifying experience, allowing you to expand your green space while nurturing new life. With the right techniques and care, you’ll have a flourishing collection of rubber trees in no time.
FAQ’s
1. Can I propagate a rubber tree from a single leaf?

No, propagating a rubber tree requires taking stem cuttings with nodes, as they are more likely to root and develop into healthy plants.
2. How long does it take for the cuttings to root?

The rooting process usually takes between 4 to 8 weeks, depending on environmental conditions and the health of the cuttings.
3. Can I use water for rooting instead of soil?

While it’s possible to root rubber tree cuttings in water, transferring them to soil once they develop roots can be more challenging, as the plants may struggle to adapt.
4. Should I fertilize the newly propagated rubber plants immediately?

No, it’s best to wait for a few weeks before applying fertilizer to the newly propagated plants to avoid root burn.
5. Can I propagate a variegated rubber tree?

Yes, you can propagate a variegated rubber tree using the same techniques as a standard rubber tree. However, keep in mind that the new plant may not retain the exact same variegation pattern as the parent plant.

1 thought on “Propagating a Rubber Tree: A Step-by-Step Guide”