Got a grater, coffee pot, or whisk? Let’s do some upcycling DIY them into awesome things for your kitchen!
Do you have any unused items in your kitchen that you no longer need or haven’t used in a while? Instead of throwing them away, consider upcycling them into something useful or creative. Like this one:
Coffee Pot Terrarium

Would you like to make a coffee pot terrarium like this too? then follow these steps.
- Clean and dry the coffee pot thoroughly.
- Fill the bottom of the coffee pot with pebbles or rocks for drainage.
- Add a layer of activated charcoal to keep the soil fresh and prevent odors.
- Add a layer of potting soil on top of the charcoal.
- Plant small succulents or other plants in the soil.
- Water the plants lightly, being careful not to overwater.
- Close the coffee pot lid and place it in a bright area with indirect sunlight.
- Monitor the plants regularly, and water as needed to keep the soil slightly moist.
- Enjoy your new coffee pot terrarium!
Fork Hook Upcycling DIY
Transform ordinary forks into trendy hooks with just needle nose pliers and power strips. For nail hanging (like in the photo), use a drill to make a hole first.

Also Read: How to Care for Pothos: A Guide for Pothos Plant Care
Upcycling DIY Grater Lamps
Searching for an uncommon lamp idea? Try making lampshades from graters!

Materials Required:
- Cheese grater(s)
- Lamp socket with cord and plug
- Light bulb
- Drill with HSS bit
- File
- Optional: spray paint, decorative items
Instructions:
- Choose a cheese grater that you want to turn into a lampshade.
- Drill a hole in the handle of the grater using a drill with an HSS bit. The hole should be big enough for the cord to pass through.
- Use a file to smooth out the edges of the hole.
- Insert the cord through the hole in the handle and screw in the light bulb.
- Place the grater on top of the socket and screw it in place.
- Test the lamp to make sure it works.
- Optional: paint the grater or add decorative items to customize it.
- Enjoy your new grater lamp!
Note: Always make sure the cord and plug are in good condition and that the bulb wattage does not exceed the maximum recommended by the socket.
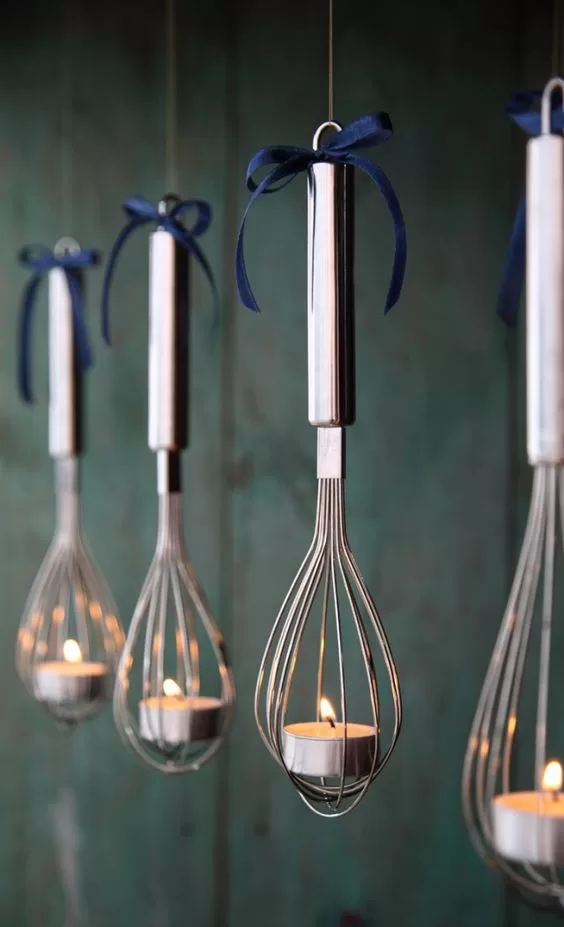
Whisk Tealight Holder
Upcycling discarded whisks into tea light holders is easy!

Materials Required:
- Wire whisk
- Tealight candle
- Pliers
- Optional: paint or other decorative items
Instructions:
- Clean the wire whisk thoroughly.
- Bend the wires of the whisk up and around the center of the whisk to form a candle holder.
- Place the tealight candle in the center of the holder.
- Optional: paint the whisk or add other decorative items to customize it.
- Light the candle and enjoy your new whisk tealight holder!
Note: Always make sure the candle is secure and stable in the holder, and never leave a burning candle unattended.
Also Read Burgundy rubber tree: the new favorite houseplant, surpassing the Monstera.
Pot shelf with flower vase
This particular shelf requires a bit more effort compared to the previous ideas, but the end result is definitely worth it!

Materials you will need:
- Wood board
- Saw
- Drill
- Screws
- Sandpaper
- Stain or paint (optional)
- Flower vase
- Pot
Step 1: Measure and cut the wood board to the desired size for your shelf. Sand, the edges and surface of the board to smooth out any rough spots.
Step 2: Decide on the placement of your flower vase and pot on the shelf. Use a pencil to mark where you will need to drill holes to hold the vase and pot in place.
Step 3: Use a drill to make the holes that you marked with the pencil. Make sure the holes are the right size to fit the vase and pot securely.
Step 4: Attach the shelf to the wall using screws. Make sure to use appropriate anchors and screws that can support the weight of the shelf and its contents.
Step 5: Stain or paint the shelf (optional) and let it dry completely before moving on.
Step 6: Place the flower vase and pot in their respective holes on the shelf.
Step 7: Decorate the shelf with any other items you desire, such as plants, picture frames, or decorative items.
Congratulations, you have now made a pot shelf with a flower vase!
